

Happy Monday and welcome to day one of Visions of Sugarplums! Several weeks ago, Lori Hairston asked me to participate in this week long christmas event. She has rustled together a bunch of creative women who were willing to put together special crafts and tutorials to share with blogland this week. I hope you will take the time to stop by each of the sites to see what the girls have put together for us all! And its important to mention that there are lots of giveaways every day as well. Im excited to get a look at each blog myself!
I will be posting three tutorials, the first one today and then again on wednesday and friday.
so with out further ado, Lets make bleached and dyed bottle brush trees!

These trees are actually quite easy and inexpensive to do!
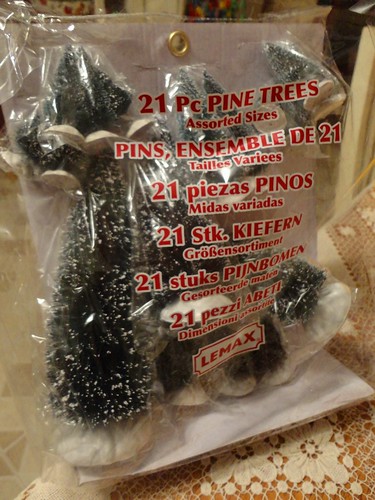
Step one: purchase your trees. walmart, Joanns, kmart and Micheals all carry packages with these trees in them. I bought a bag at Kmart on sale for 11.02 and another at Micheals on sale for 10.99! and if you dont find them on sale, use a coupon.
Also micheals and Joanns carry little packages of small undyed trees by Tim Holtz. I bought a package to play with as well. they color very nicely, but they are small.

Step two: bleaching. I filled a medium sized bin (that just happen to fit perfectly in my sink) with hot water, enough to cover all the trees and a couple cups of bleach. I used a pair of tongues so I would not need to touch the bleach water, but you could use rubber gloves as well. Let them soak and swish them around a bit until they are very pale. they wont turn white, at least mine didnt, but they get light enough.
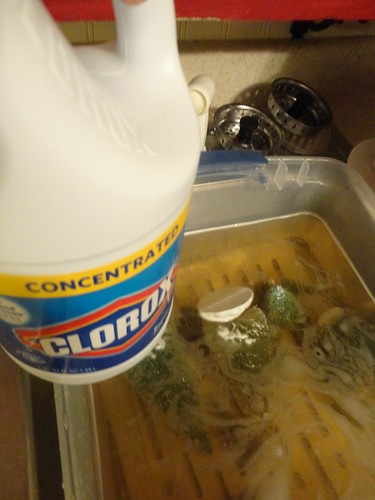
I took some out before all the color was gone because I like the lighter shade of green.
Step three: Rinse off the bleach water well

Step four: let them dry.

STep five: dying. I did it a couple different ways, first I rinsed that bin out that I used to bleach and filled it with enough hot water to cover however many trees I wanted to dye what ever color dye I was using and mixed in about a quarter of a bottle of the Rit dye.. (I have also used the powder dye in the past, it works equally well). swish the trees around and leave them in until they are the desired color that you want. It doesnt take very long, only a few minutes.
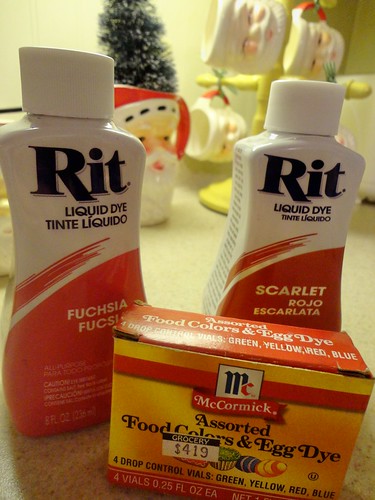
I also tried dying with food color and vinegar, like I would for dying easter eggs. that worked ok, but not as well. I recommend using the dyes.
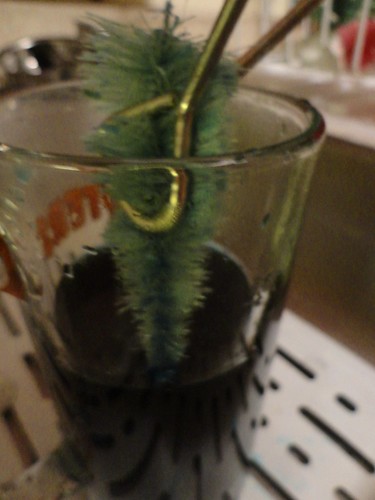
I also did some of the trees individually in tall glasses of hot water and dye. I think I liked doing it this way best.

After your trees are the colors you want, let them drain and dry!

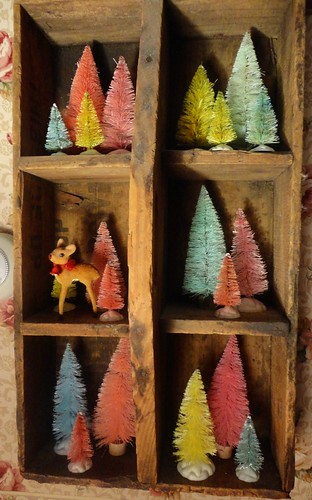
Depending on how many you do, you could end up with a colorful little forest!
I Love how they turned out and left most of the ones I made plain. This pic below shows what I did with a bunch of them.
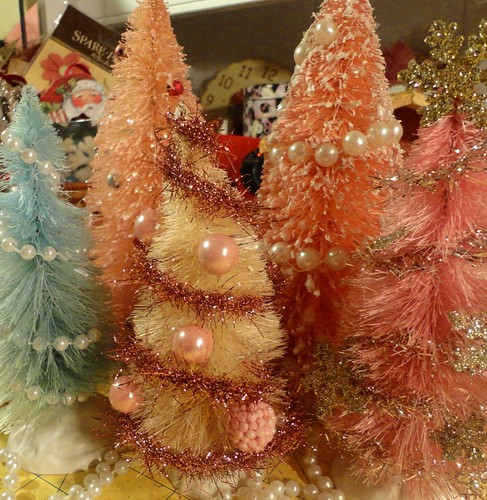
I also dressed some of them up. You can do what ever you want with them. I hope you get a chance to give this a try. It really is pretty simple and not even very time consuming. And the results are just plain fun!
please be sure to check to see what the other girls are doing and what the giveaways are for today as well!
Maria - http://asimplefive.blogspot.com/
Regina - http://reginaeaster.blogspot.com/
Ignacio - http://nicecranedesigns.blogspot.com/
and look for these giveaways:
Giveaways: $20 gift certificate - Nicecrane Designs - http://www.nicecranedesigns.com
1 set of choice - Moonlighting by Mary -http://www.etsy.com/shop/MoonlightingByMary
$10.00 gift certificate - Paper Sweeties - http://www.papersweeties.com/
1 set of choice - Springhill Graphics - https://www.etsy.com/shop/SpringHillGraphics
have fun girls!
and dont forget those of you doing the elf challenge besure to send me your pics this week. Ive not even made mine yet.. but I will get to them!
I did manage to get most of my house decorated for christmas over this weekend. I have the tree up, but not decorated. I'll get to that soon too.. lol!
have a great monday!
xoxoxoxoxoxoxoxoxoxoxoxoxoxoxoxo
27 comments:
Those colorful trees would be perfect to use at Easter time too! Can't wait to see more crafty goodness, dear Viv! Happy December!
I see visions of Sugarplum trees in my future!!! I love them Viv! Thanks for the tutorial!
Oh, they are all so pretty! Thanks for sharing! I have been wanting to try making some! Happy new week! xo Heather
oh my word, i have never seen anything like this before...i must try this....love it
Thank you for such a great post Viv. I have a package of trees, and I think I'm going to dye them at Easter time, like Kim K said.
OK- going to check out those other blogs! Fun Fun!
And I will send you a pic of my Elf tomorrow!
Erica :)
aww very sweet thanks for sharing
Thanks for this post. I bought some very small trees and now I want to play with them.
What a great tutorial, Viv! Thanks! Plain or decorated, I just love these trees!
I don't recognize any of the blogs you listed so I'll have fun exploring. ♥
Thanks for sharing!! I just bleached a few of the small trees, and still want to dye some of them. Yours look so happy and cute!! Love them with all their bling on too!! :) Happy December!! xo Holly
OMG ,,,,what a creative and vibrant idea,,,,,Thanksssss a lot for the tutorial,,,,,,,yiiiiiiipeee.
Wicked colored coolio! I love using bottle brush trees in shadow boxes for many different holidays! I love what you did with yours! Thank you so much for sharing with this happy hopper!
Oh my goodness - these Christmas trees are so wonderful - thanks for showing how its done! TFS
Love these trees and all the colors. Geat tutorial, and I need to go visiting.
Love your colourful little forest - TFS.
Toni xx
Oh, my! I LOVE your trees - aren't they so very yummy? So glad you have joined Visions of Sugarplums!
Love the variety of colors you used. I am your newest follower.
Judy
You are a sweetie to put this tutorial together for us. Thank you! It's always fun to visit you!
your trees came out fabulous!! I love them Grace xoox
thanks for such a great tutorial on doing something I'd never heard of before. Always thought you were stuck with whatever color trees you had. Love all of the colors. Really pop.
I just love your blog!!! I have not been on much lately but I'm Back. :-)
Hugs
Fran
What a fabulous idea! I love the colors you created!! Thanks so much for the great tutorial too!
Awesome tutorial!! And I love your display of the finished trees!
Love your trees. I have to bleach some of my trees. Thanks for the post on how you do it. WONDERFUL!!!
Hugs
Fran
Love your trees. I have to bleach some of my trees. Thanks for the post on how you do it. WONDERFUL!!!
Hugs
Fran
Cute, cute, cute!
Great tutorial..and beautiful colors!!
Great tutorial..and beautiful colors!!
Post a Comment